
 Jane and John's RV pages
Jane and John climb aboard the LED lighting bandwagon
Tips and techniques for working with strip lights
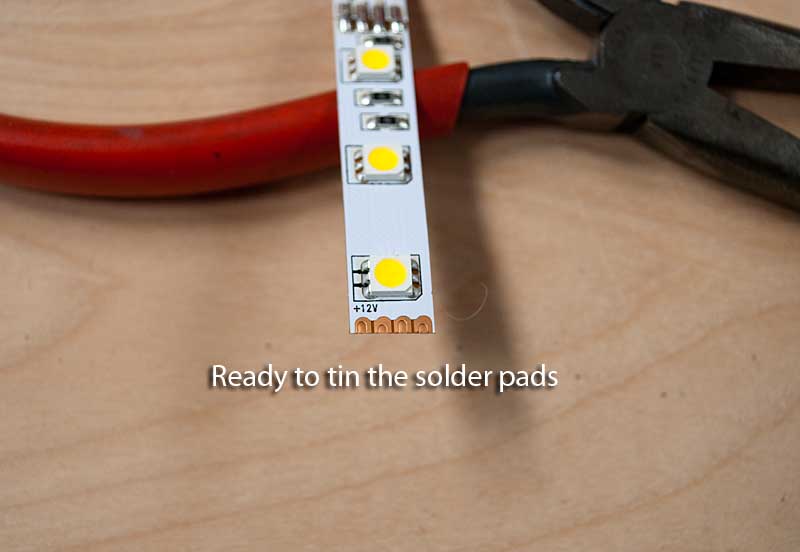
You will need some good soldering skills and the right equipment to solder wiring to the sometimes very tiny solder pads (sometimes called lands.) Too much heat and you might ruin a segment of your strip, too much solder and you might have a short, too little solder and the wires won't stick. If the tip of your soldering iron is too large, you won't be able to focus the heat in the correct area. Let's get started with a few pictures.
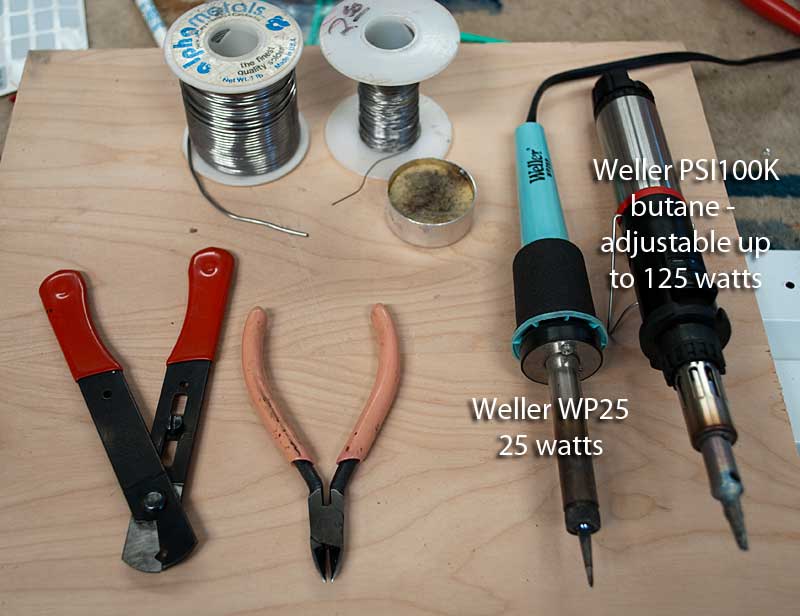
Typical tools I use for delicate wiring jobs. Small wire strippers, very small side cutters, my trusty Weller soldering irons, sponge for keeping the tips of the irons clean and lastly a roll of typical solder and then an almost empty roll of very fine solder (note to self - find more fine solder ;-) ) Notice how tiny the tip of the Weller WP25 is - exactly what is required to solder to the strip lands!! The butane powered Weller is used for any other job where a higher heat is required.
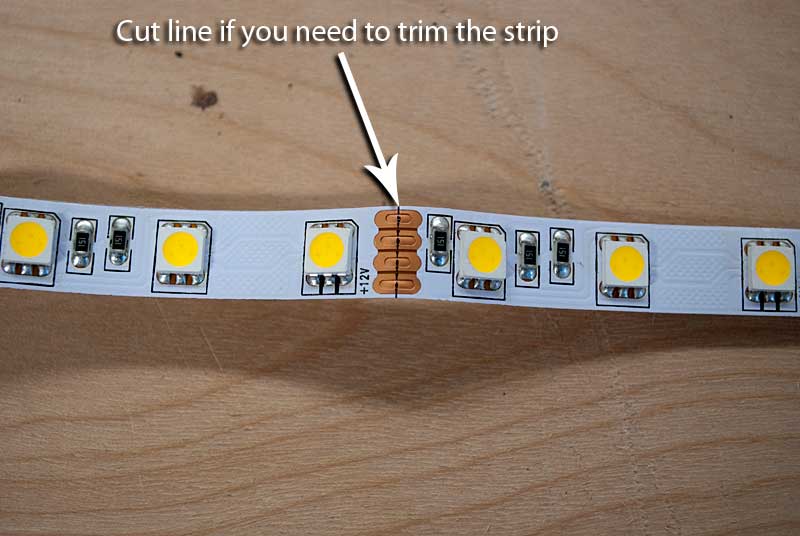
Please note that every LED strip will not look exactly like this, but they should all be somewhat similar in appearance.
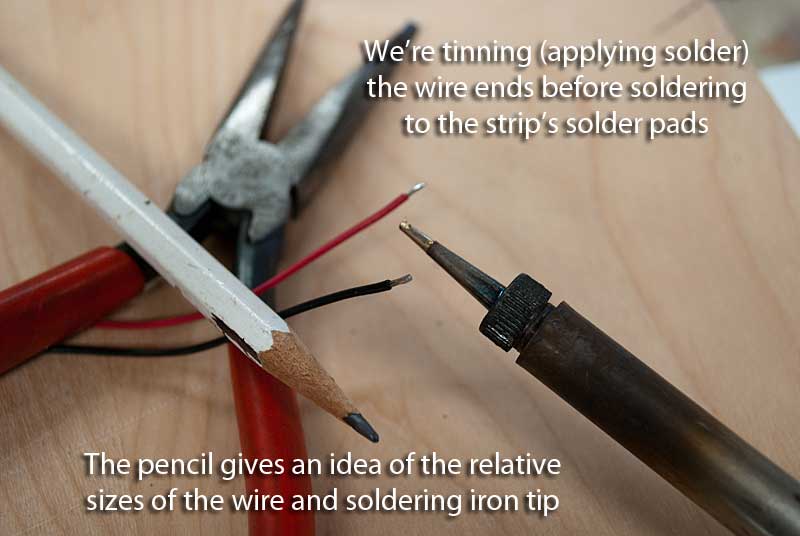
This is a necessary step - ALWAYS tin the wire ends before attempting to solder them to the solder lands on the strip. This way you do not have to keep the heat applied any longer than necessary - the tinned wire ends will easily melt to the tinned solder lands with just a tad bit of heat (two pictures down.)
This is what my strip lights look like where you apply power. We're going to connect a very small red (or positive) wire to the left-most solder land and then bridge with solder the right-most three lands for the black or negative wire. I have no idea why there are three lands for the negative wire but I suspect the light strip has three different brightness levels. I want full brightness, so we're going to bridge all three together.
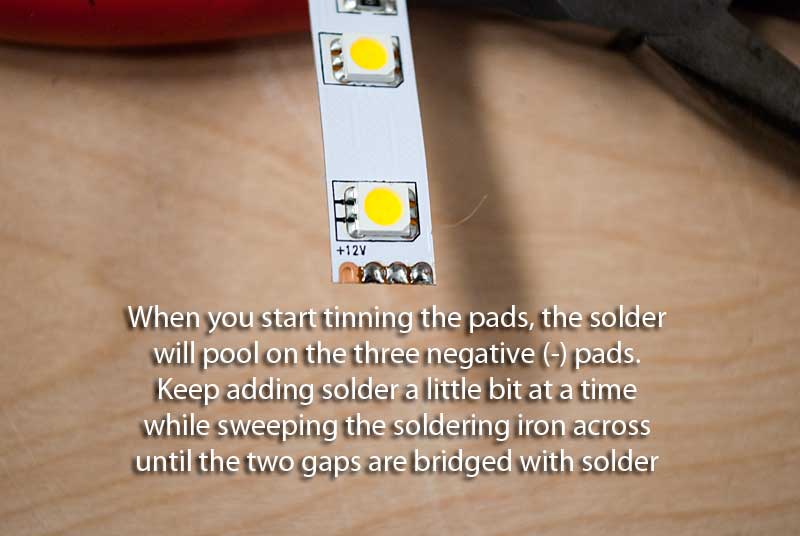
This part takes a little finesse. Only apply enough heat to melt the solder (use a very small diameter solder - it melts faster) and keep adding solder a little at a time until the two gaps are bridged (we'll get the the left-most land a little later.)
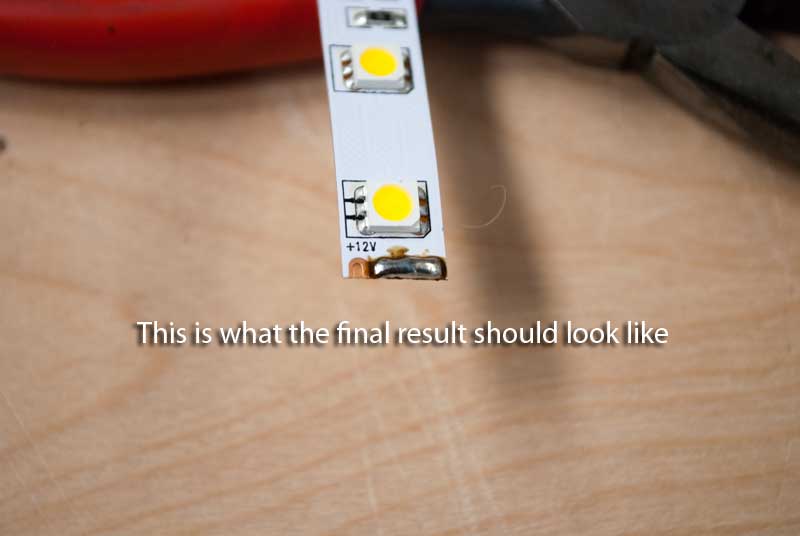
What yours should look like
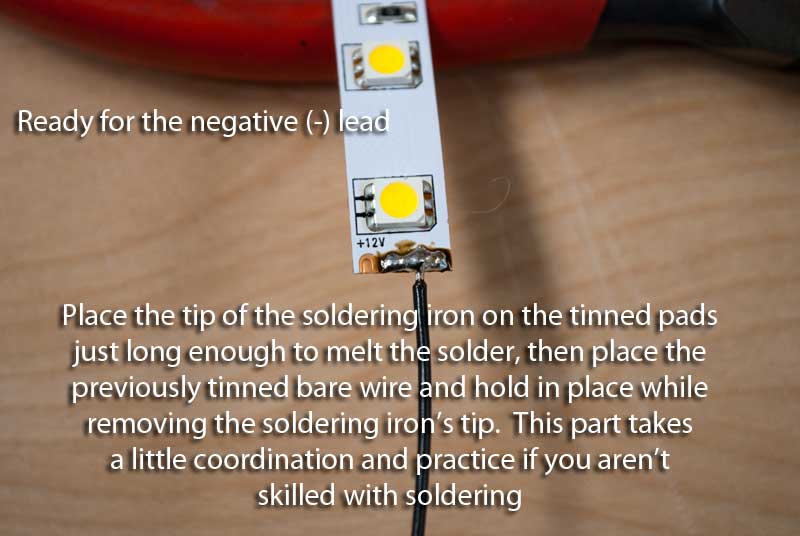
Touch the tip of the soldering iron to the center of the solder mass (it won't take long to re-melt the solder) and when it melts place the previously tinned black wire on the center of the solder blob. Quickly remove the soldering iron and hone the wire very steady for two or three seconds until the solder solidifies.

We've added the red or positive lead and now the strip is ready to test (always test before you install!!)
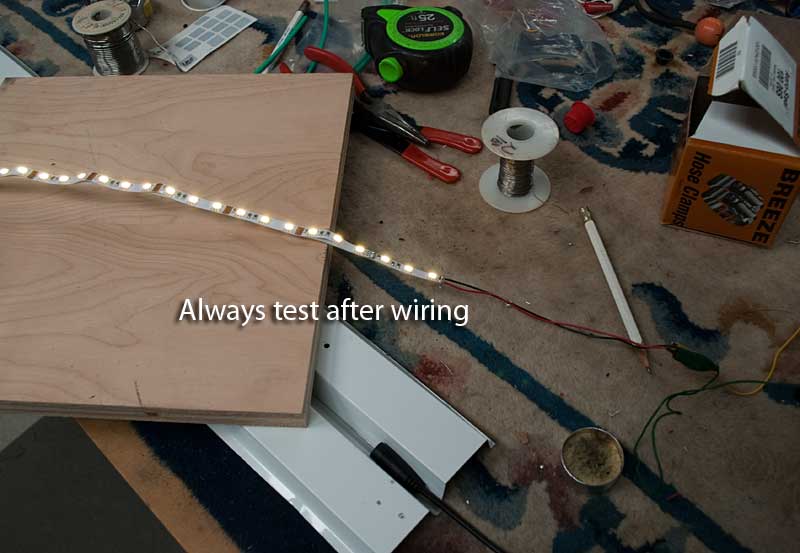
It works! How about that :)
Now we're ready to move on - let's install some strips!!
Page 1 - Introduction
Page 2 - This page
Page 3 - Installing the strip lights