
 Jane and John's RV pages
It's a dirty job, but John's up to the task
The Dometic SeaLand Concerto toilet gets replaced
Removal of the Concerto toilet, prep for the new toilet
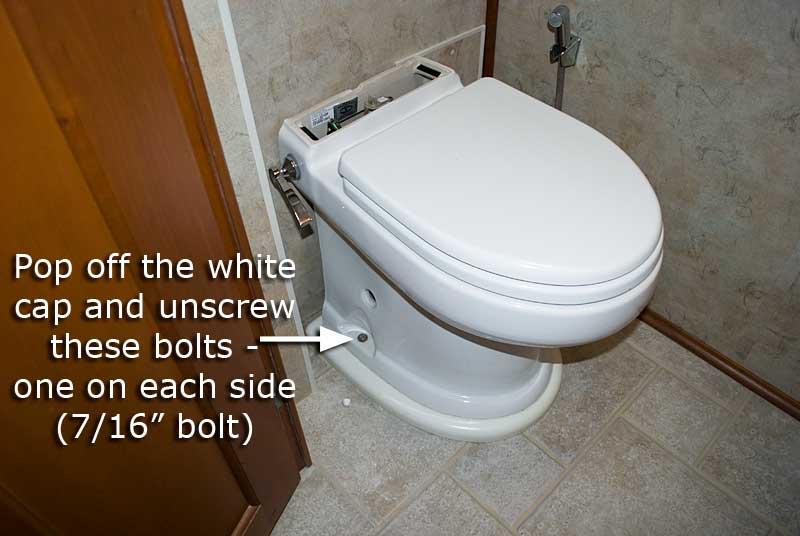
Obviously the first task is to remove the old Dometic SeaLand Concerto toilet. Grab a large towel, cut off your water supply (shore water and turn your pump off) and open up a cold water faucet to drain the water from your system. Use a 7/16" wrench or ratchet and unscrew the two 1/4" lag screws securing the Concerto base to the floor. Pull up on the toilet and move it away from the wall enough to get your hand behind the unit. Place the towel behind the toilet to soak up water that will escape when you unscrew the water supply line.
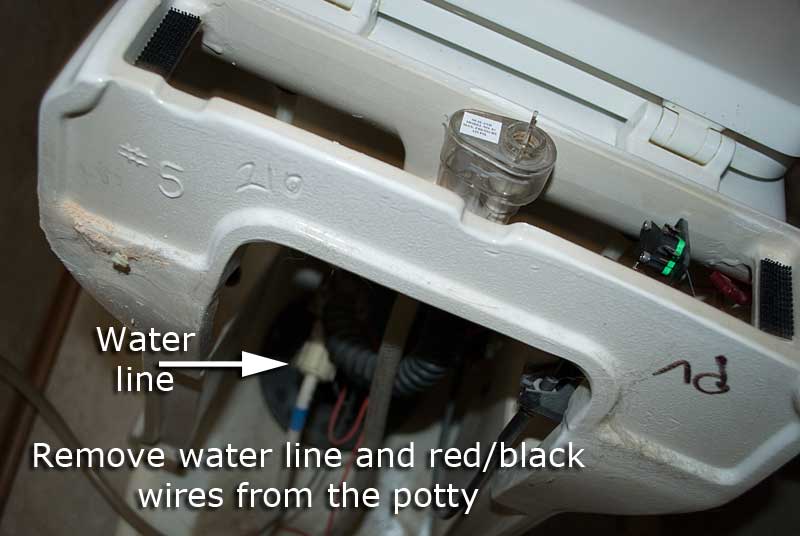
Follow the water supply line to the Concerto and unscrew the connector - you shouldn't need any tools for this. Now unplug the red/black wires and then pull the toilet out and place it on a blanket, towel, furniture pad, etc.
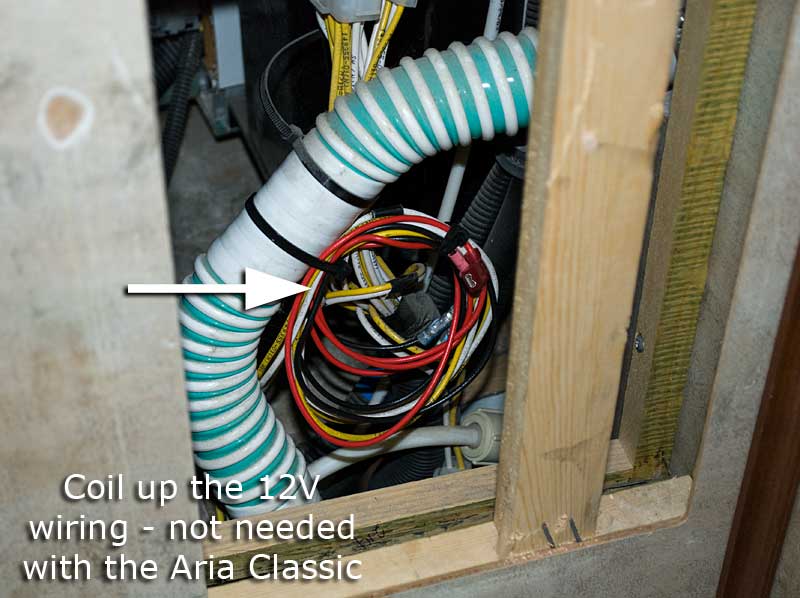
Unscrew four very long #10 (or was it #8) sheet metal pan head screws that are securing the Concerto flange adapter to the floor flange and pull it out, you will not need this plastic part. Clean up the area - never a better time. Pull the red/black wires from the wall opening and secure them out of the way
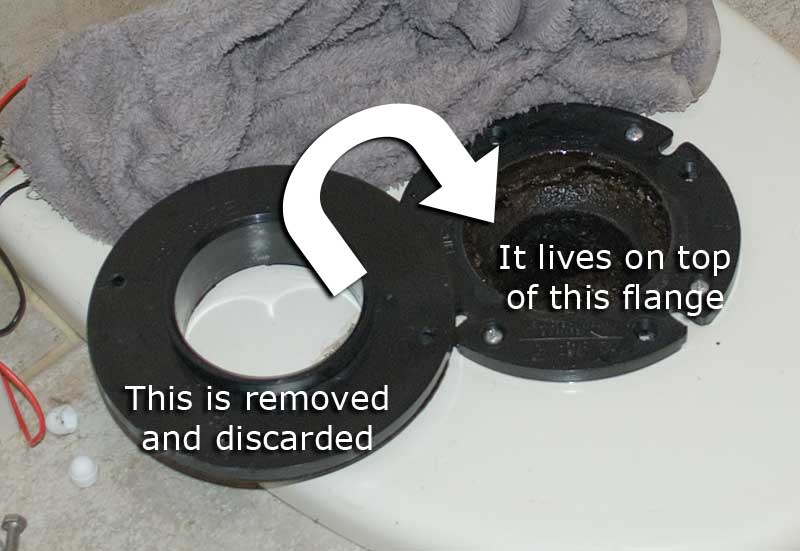
Referencing these instructions, it's time to prepare for the new potty install, remember, this write-up is specific to the Thetford Aria Classic or the Deluxe II (the Deluxe II is the electric version of the Classic.)
You need to choose a spacer from the Spacer Kit - you get two thin ones and a thick spacer. For our replacement, the thin one screwed on top of the old SeaLand floor flange provided the required 7/16" height from the floor (the plastic Winnebago base) to the top of the spacer.
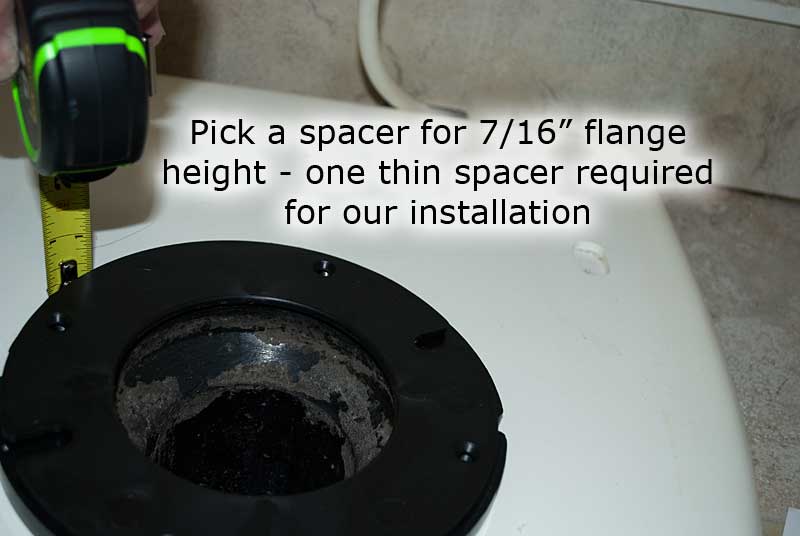
So now we have the old 12V red/black wires secured out of the way, the area is all cleaned up, and a properly sized spacer chosen. Next step is to screw the spacer on top of the old SeaLand floor flange; clean the mating surfaces with alcohol and apply a generous bead of silicon caulk around the floor flange. Place the new spacer on top of the flange, line up the holes and screw it down.
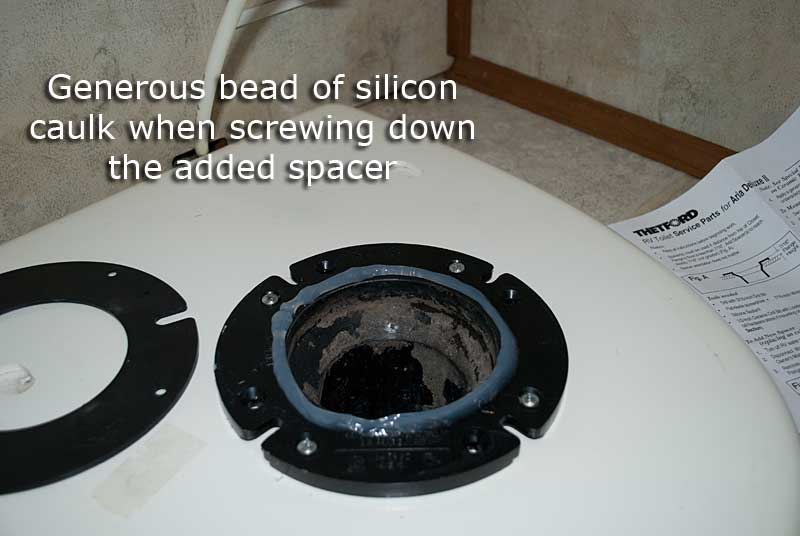
Almost ready to install the new Thetford Classic!
Page 1 - introduction
Page 2 (this page) - removal of the Concerto, prep for the Aria Classic
Page 3 - installation of the Aria Classic, project wrap-up