
 Jane and John's RV pages
We finally kiss the one-thirds goodbye!
Hello Garnet SeeLevel tank monitor system
>Page 2 - pictures of the 'special tools' and jigs I used, picture of the Garnet system, disassembly of the plumbing bay part 1
It is always helpful to gather up all of the stuff you will need before you start a project so you don't have to stop and round up supplies or tools. I never like an unplanned break in the workflow because I sometimes forget what the heck I was doing and where I stopped. Here's a few pictures of tools and things you will need at some point:
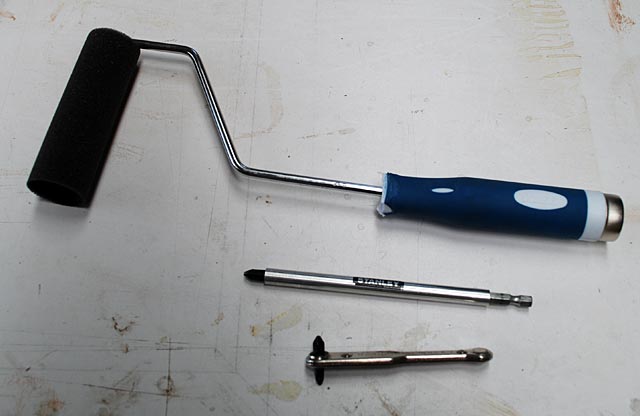
The paint roller is sold for trim work and the roller part is foam. I have modified the roller handle by cutting off some 'ears' that were at the very top of the handle so the roller would fit down the side of the fresh water tank. Use the roller to press the sensor strip against the side of the fresh water tank.
Next we show a long driver bit holder with a Phillips bit - I used this to remove the top (of three in a vertical row) screw for removal of the top plumbing bay panel.
Lastly is a right-angle Phillips screwdriver - there is one screw with very poor access on the aft end of the top panel (we have included a picture of that screw position.)


You will need a Dremel tool with a cut-off wheel if you want to install the new display in place of the old tank monitor. Others have left the old tank monitor display and push buttons in place and installed the new Garnet display on top of the old one. You could use a surface-mount thin electrical box, make a box out of wood, etc. The other invaluable tool is a cordless drill or preferably a driver drill like my Lithium battery Hitachi (it's a great drill!)

The above strips might look like cardboard, but they are actually strips of old Masonite paneling I cut up to prepare and apply the new sensor strip against the wall of the fresh water tank. There is not enough room to get your hand in there, so you will need to come up with a similar device. Whatever you use, it needs to be flexible and fairly strong
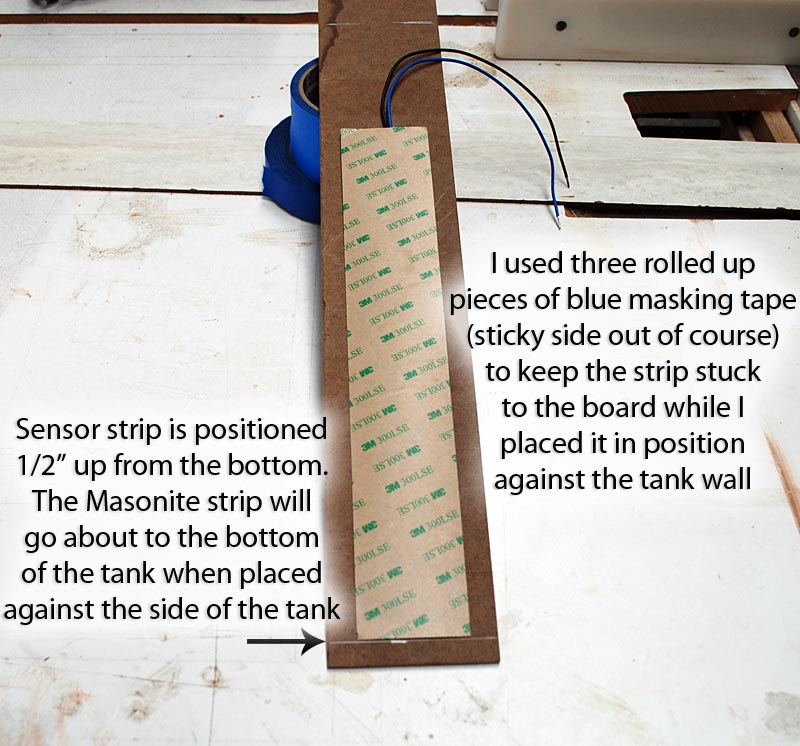
This idea of using the Masonite strip to position and initially stick the strip against the fresh water tank wall worked out extremely well. The general idea is to place the sensor strips no closer than about 1/2" from a tank top or bottom. For the fresh water tank, the strip wasn't long enough to cover all 15" of the tank wall, so I placed it near the bottom since the critical element is knowing how much water you have left in the tank to use. For the black/gray tank, the critical parameter is knowing how much capacity you have left before the tank is full, so you want to be sure and have the sensor as close to the top as possible while staying about 1/2" from the top.

Here's what I ordered - the model 709 with an extra display. As you can see, there isn't a whole lot to the kit!
Let's start the project! Disassembly of the plumbing bay

Start the disassembly by removing all of the screws around the perimeter of the top panel and the three or so screws on the panel with all of the plumbing. Note the three screws in the below picture just to the left of the door gasket - these need to be removed as well before the top panel can be removed. Oh, I removed the metal panel that held my paper towel holder and covered up some of the bay innards a couple of years ago and I never put it back - I like the improved access to the pump and accumulator tank with that panel removed.

These three screws are a little tricky to figure out - they are three of the fasteners you need to remove to pull out the top panel
Page 1 - project introduction
>Page 2 - pictures of the 'special tools' and jigs I used, picture of the Garnet system, disassembly of the plumbing bay part 1
Page 3 - we finish disassembly of the plumbing bay and look at wiring
Page 4 - we test and finish up sensor strip installation
Page 5 - building a bezel for the outside display, finishing up the outside
Page 6 - access to the fresh water tank, installing the sensor strips on the tank wall, sensor wiring
Page 7 - we start installing the inside display, removal of the old display board & switches, cutting off the solar panel part of the old circuit board (optional), cutting an opening in the OnePlace steel panel for the new display
Page 8 - Wiring and project wrap-up