
Installation of a G&R Imports lift kit on a 1990 Suzuki Carry
Update, May, 2010
The Carry has been lifted for about two years (18 months? - I forgot) and is still doing well with the lift. I do have a slight clicking noise in the front end somewhere but I don't think it has anything to do with the strut risers. It is still easy to steer, runs well and has significantly better traction with the new tires. No regrets about doing the G&R lift.
-John
My 1990 Suzuki Carry had completely worn out and dry-rotted tires when I bought it, and besides had absolutely no traction for running around our small ranch. I even had to let the clutch out slowly on our gravel road or the small and mostly bald tires would spin merrily away.
I began a months-long investigation of what kind of tires to put on the wee beastie - much of that data gathering happened on the Mini-truck forum. The forum is an invaluable resource of mini-truck owners, dealers (domestic and in Japan), and those curious about these little trucks.
The fellow I bought my truck from recommended G & R Imports for mini-truck parts, and others on the forum also recommended them. After I did some surfing, I decided it would be much better to talk to a tire dealer so I could ask questions. Gave G & R a call and had a very useful and pleasant chat with somebody in their parts department. This guy was completely tuned-in and knew what I wanted after we chatted for a while. I had my eye on Carlisle All Trail 23/8/12 ATV tires primarily because they are rated to carry the full loaded weight of the Carry unlike most other ATV tires. That was a good choice and then we discussed wheels. The new tires wouldn't do well on the original wheels (they are too narrow) - there were several options and I didn't want a wheel too 'gaudy', but finally selected the Super Grip 5 wheels. I was surprised to see these wheels were made in China, but they are very finely machined and finished.
The G & R parts salesman said I would need a suspension lift with the new tires or I would have a tire clearance/rubbing problem - this is conflicting information from other reports I have read on the forum, but I trusted his advice and bought their lift kit. It is about a 2.75" lift which is apparently the most you can lift the Carry without causing driveline problems. Okay - so four tires mounted on new wheels, one lift kit and shipping came to about $750. That's a bit of change, but I think it will absolutely enhance the performance of the Carry not to mention the looks :-)
The lift kit arrived about six days after I ordered (this includes a weekend!), and the tires/wheels arrived the next day. Due to the poor packing by the tire/wheel vendor, one wheel/tire and all of the lug nuts are missing. I called G & R and no problem - replacements are on their way! (These guys are very easy to do business with!)
The lift kit came with no instructions, but G & R said call if you need installation help. I did call with a couple of questions and quickly got the procedure figured out. The entire lift kit job only took about 2.5 hours, but I have a well-equipped shop and everything I needed was at hand.
Lets take a look at the pictures...

This is the G & R kit EXCEPT for the fastners. You will need the following Grade 8 hardware:
Strut spacer:
6 each 3/8" X 1" bolts
6 each 3/8" nylon locknuts (or lockwashers and plain nuts)
Rear shackle:
4 each 1/2" X 4" bolts
4 each 1/2" nylon locknuts (or lockwashers and plain nuts - use threadlocker if you don't use locknuts)
8 each flat washers (I really don't think these are necessary, but I used them anyway)

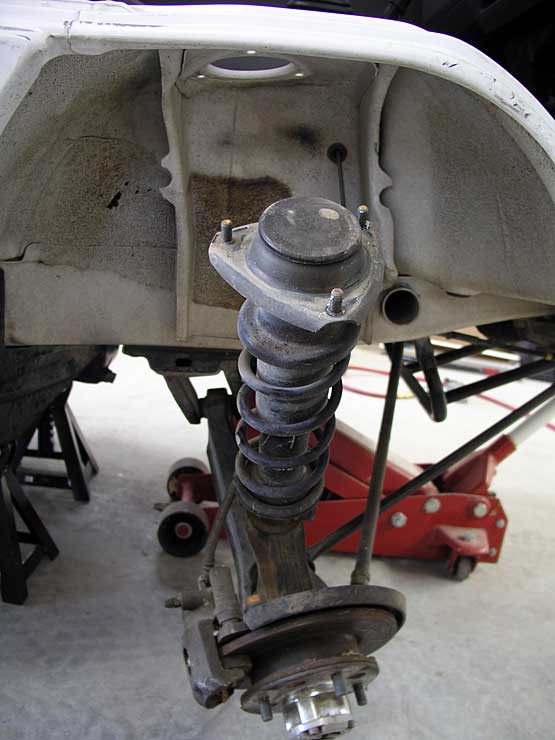
Completely stock right-side strut assembly - this is a "before" picture

After jacking up the front end and placing jack stands in a secure place on the frame, remove the front tires (of course) and pull the retaining clip to free the brake hose from the lower strut. The clip is a little difficult to remove - I found a flat-bladed screwdriver works best

Remove the front seat bottoms to expose the strut mounting nuts. Remove the nuts
Now you have a wonderfully free strut that's ready for mounting the spacer!

Now mount the spacer on top of the strut using the nuts you removed earlier. Pay attention to the orientation of the spacer! The side that faces inboard has a flush surface from the cylinder to the edge of the top mounting plate
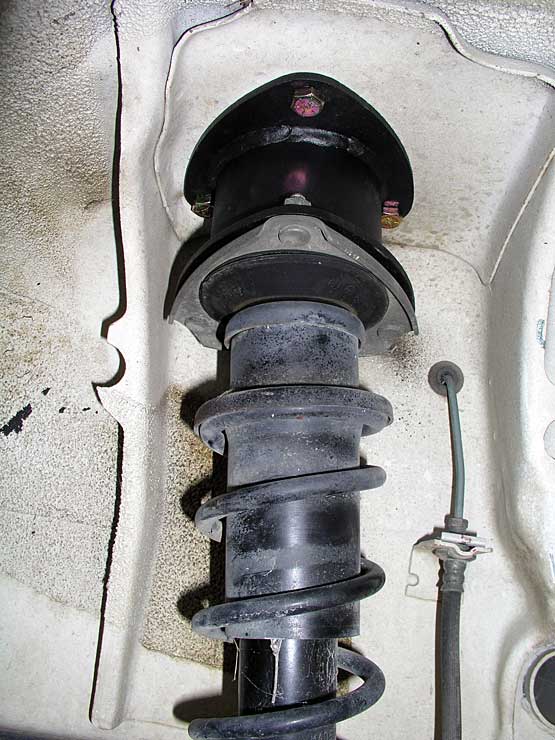
Here we are with the strut reinstalled complete with new spacer!

And this is the top of the strut mounting showing the new Grade 8 nuts and the spacer
Now for the rear!
This is very simple - most of the problem I had was trying to figure out where to place my floor jack. I did need to cut the old shackle studs due to stuff being in the way of simply pulling out the old shackle plate. Let's take a look...

Here is the shackle with one nut removed

Get your Sawzall and whack the stud in half
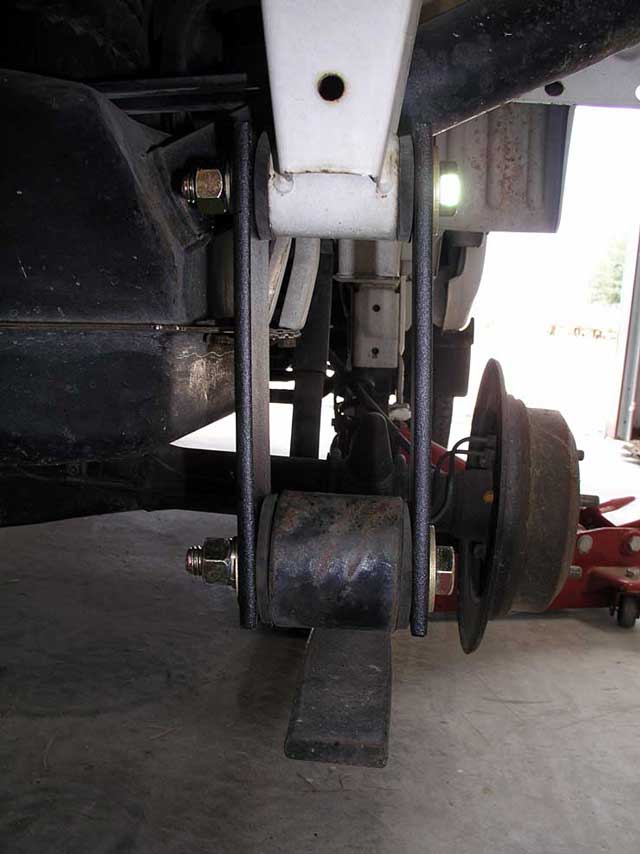
The right side is completed! Be sure and use a threadlocker solution on the bolts if you don't use nylon locknuts - if you use lockwashers, don't tighten the nuts too tight so there won't be free movement of the shackle

Left side is completed. Notice the top bolt faces differently due to clearance issues with the tailpipe. I had to remove the tailpipe hangar so I could move it out of the way to insert the top bolt. I haven't completely tightened the nuts, so the plates are a little skewed looking

All finished! Here you can have a look at the wheel alignment
Thanks for stopping by!
-End-